

I started taking dance classes when I was 5 years old and I kept dancing all through school and college. Back in those days, we used a laundry basket to keep costumes and accessories together. Times have changed. I have been a dance teacher for about 15 years and the coolest dance bags I’ve seen at competitions and recitals are the big duffle bags that have built-in garment racks. Dream Duffel seems to be the most popular brand, but there are several out there to choose from. The downside to these super-cool bags: the price. The least-expensive Dream Duffel is over $200, and similar style bags on Amazon are at least $100.
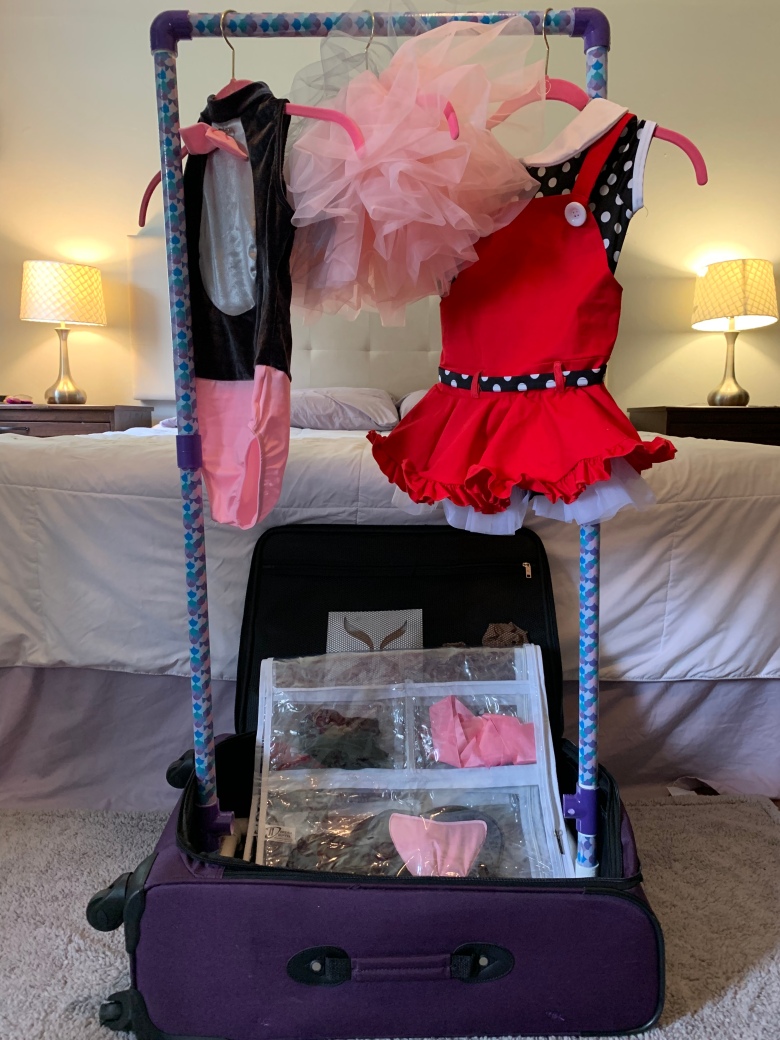
Now that my daughter’s class has started competing, I wanted a dance bag with a rack to keep her costumes and accessories organized (and wrinkle-free) backstage, but I didn’t want to make an investment in one of the expensive bags yet. (She’s only 5, she may or may not stick with dance.) So I decided to make one.
Materials:
◦ Rolling suitcase (you could also use a rolling duffel bag, just be sure it has a sturdy base)
◦ 1/2 inch PVC pipe (amount will depend on how big the suitcase is and how tall you want the garment rack)
◦ Six 90° elbow PVC fittings
◦ Two “T” PVC fittings
◦ Four “coupling” fittings
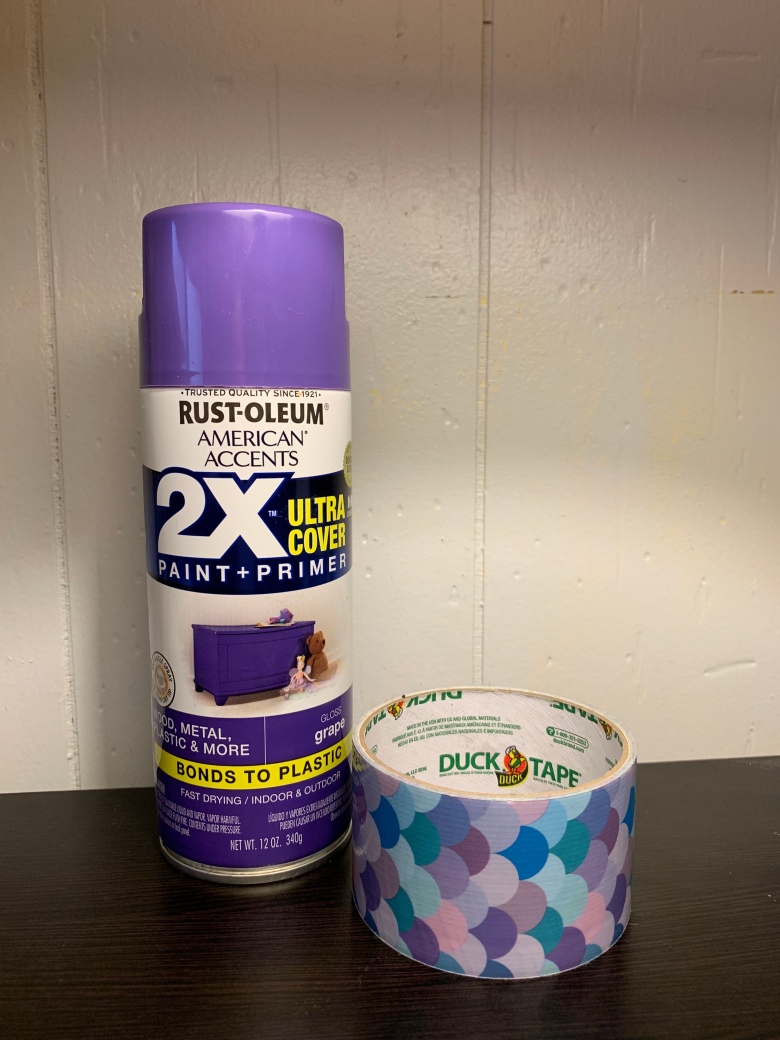
◦ Decorative duct tape
◦ Spray paint
◦ PVC cutters.
◦ Tape measure
For all of the cutting, I highly recommend PVC cutters; they make this project so much easier. You could also use a saw.
To make the base of the garment rack:
Measure the inside of the suitcase. Mine is 23”x17”
Cut two 20.5 lengths of PVC for the long sides (the fittings will take up the rest of that space).
Cut four 6.5 inch lengths for the shorter side. Two for each end.
The base should look like this:

Or refer to this more detailed breakdown if that’s helpful:

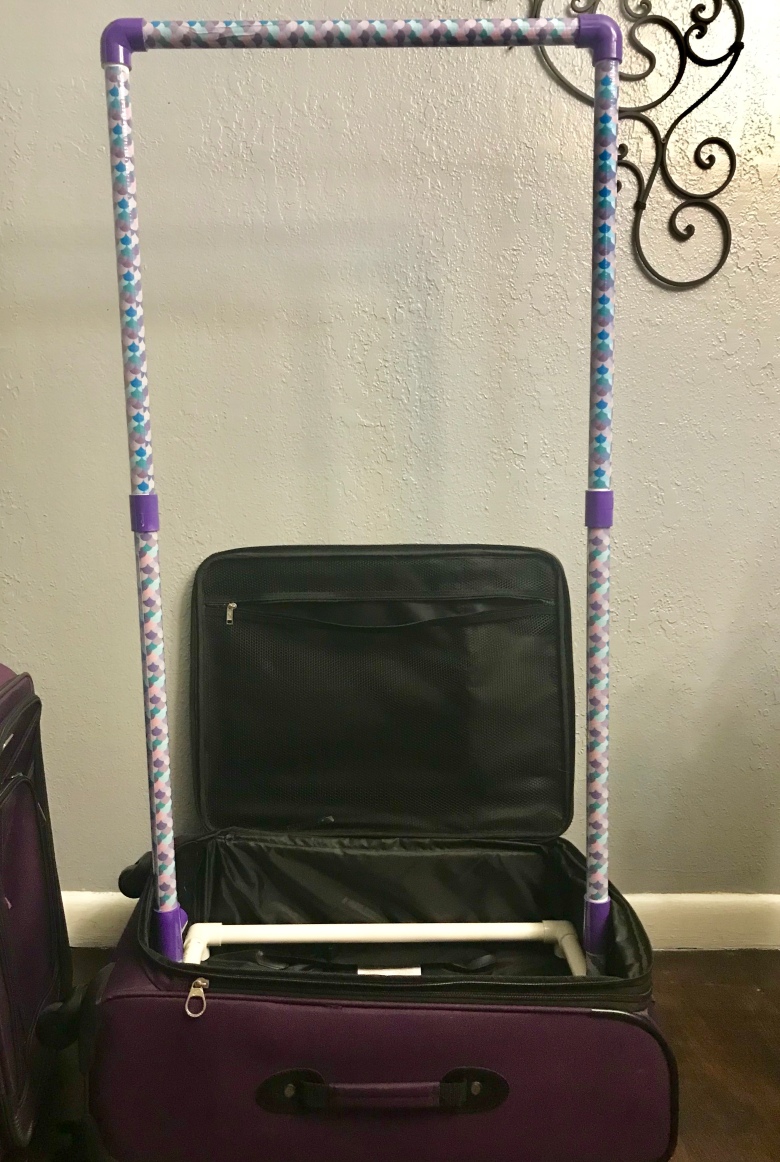
Once the pieces are assembled, fit the base inside the suitcase. I didn’t do anything to permanently attach this to the suitcase, because I want to be able to remove the base and use the suitcase later.
The upright portion of the garment rack:
Take the four couplings and the two remaining elbow pieces and spray paint them.
While those are drying, cut two 3 inch lengths of PVC, and four 20 inch lengths (these form the two vertical parts of the rack), and one 20.5 length of PVC for the horizontal bar. Again, the lengths will vary depending on the size of your suitcase and how tall you want the garment rack.
Cover the PVC in decorative duct tape. These are the colors I chose for my daughter’s:
Once each length of PVC is covered with tape and the fittings are dry, assemble the rack.
OPTIONAL (BUT HIGHLY RECOMMENDED) STEP:
Once the paint on the fittings is dry, and before assembling the pieces, sand the inside of each fitting. PVC pipe and fittings are designed to fit together snugly. This makes perfect sense for the original intended purpose of these materials (plumbing), but it makes disassembling this rack very difficult.
I used a sanding bit for a power drill for this part, and it worked really well. You could also use a gritty sandpaper for this step. It would take more time, but it would still work.

I too was astonished to learn this fact a month back. Garment bag is a carry-on bag instead of a personal item. Thanks to this post, I was not embarrassed at the airport.